To give you full control of owning your digital footprint, mTap gives you a range of customizations and options for your digital profile. They can be managed through the Menu, where you can activate your NFC devices, manage your Tags for efficiently organizing your contacts, work with follow-up settings, manage the permissions your have grated mTap through your phone, integrate your CRM, upgrade your plan and learn through our tutorials.
Sign in to your mTap profile and navigate to the Menu button located on the right most bottom corner of the screen.
1. NFC Devices
To activate a new device, select "NFC Devices". Follow the instructions here for a detailed user guide on activating your NFC devices.
2. Tags Manager
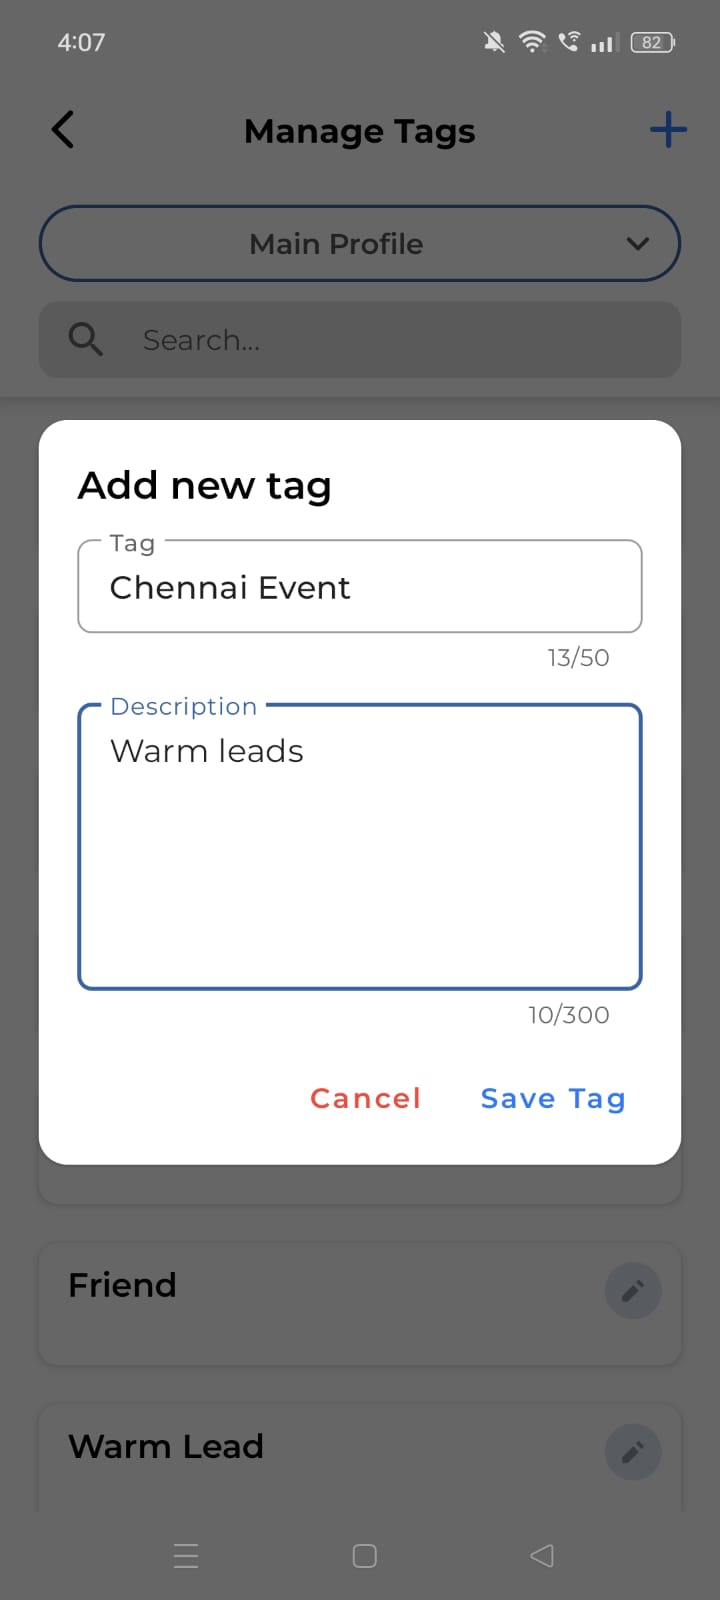
The "Tags Manager" will lead you to the "Manage Tags" screen.
On the "Manage Tags" screen, you will see a dropdown menu with a list of all your profiles. Select the profile to which you want to add the tag.
- Press the "+" icon which leads you to the "Add New Tag" overlay.
- Add the name of your tag and the description. Press "Save Tag".
- To edit your recently created tag or any other tag in the list, select the pencil icon and proceed with the editing.

3. Follow-Up Settings
mTap Hub offers a comprehensive suite of features to help you effectively follow up and engage with your new connections.When you save a contact in mtap Hub, the basic follow-up templates are automatically enabled.
To work with follow-up settings, select the respective option in the "Menu".
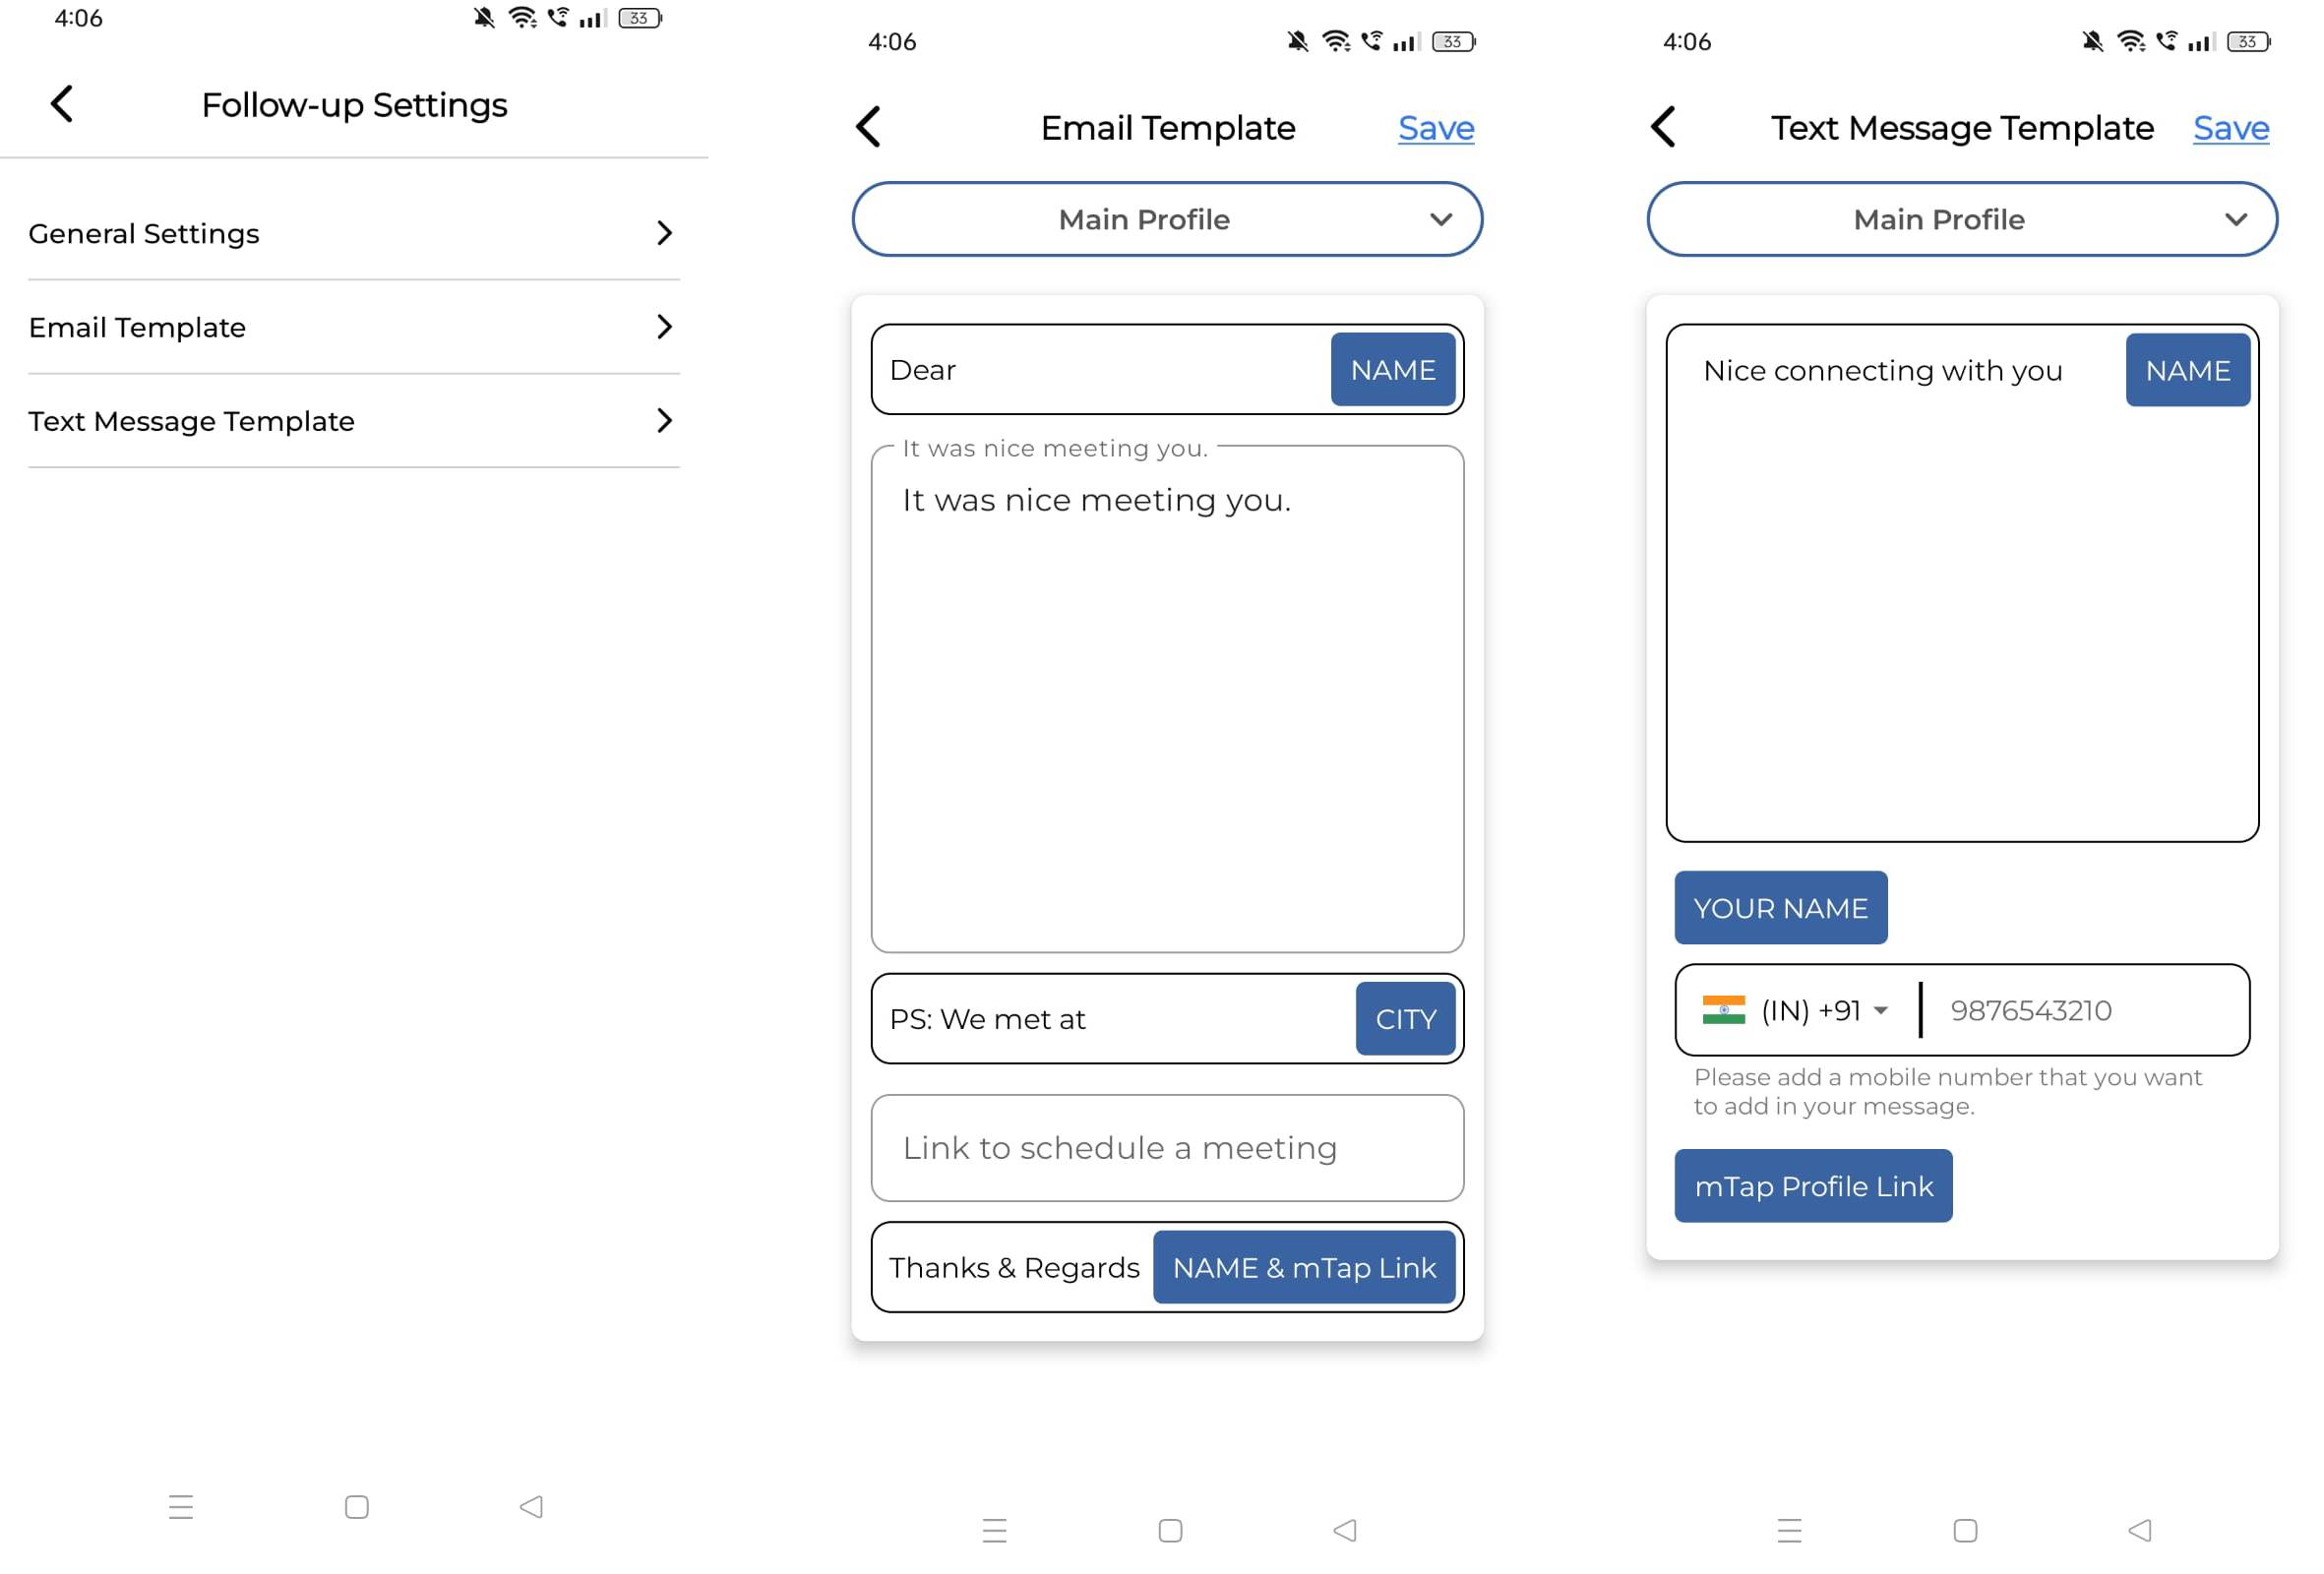
You are presented with three options, General settings, E-Mail Template & Text Message Template.
General Settings:
These are the general follow-up settings.
Toggle the switches as per your choice
A. E-Mail follow-ups will send a templatized e-mail with a shared note to your new connection. The choice of sending it manually or automatically depends on you.
B. Text follow-ups will send a templatized message with a shared note to your new connection. The choice of sending it manually or automatically depends on you. You can send a message via. WhatsApp or SMS.
C. The feature "Save Contact In Phonebook" allows you to create a copy of a contact that has been added to your mTap Hub and save it directly to your phone's contact list or phonebook.
D. Lead Push Notification TBD
E-Mail Template:
To set up the e-mail template, select the "e-mail template" option.
- The "Email Template" screen will show up. Locate the dropdown menu. From the drop-down menu, select the profile for which you want to create the email template.
- Write the text you want to send across as a follow-up message when you connect with someone.
- Text boxes marked with blue labels are indicative of the elements mentioned in the labels. They will show up in the same order and position, along with your message.
- Press "Save" in the top right corner.
The same process is to be replicated for the Text-Message Template.

4. CRM Integration
For a detailed guide on CRM Integration, refer to the guide here.
5. Logout
Select "Logout" to log out of the mTap app. Confirm the same on the overlay that appears.
