Hub, being the nucleus of mTap software is where you work with your leads and contacts. Leads are generated when someone fills out the ‘exchange contact’ form from your profile and clicks on ‘connect’. You may choose to convert a lead into a contact to follow up with them. Your mTap Hub can be easily integrated with CRM, a tutorial for which can be found here. Just like contacts, the leads are segregated for each profile. Only contacts are integrated into CRM as prospects because you have qualified and determined them to be a good fit for selling your product or service. Thus, mTap gives you control over what you direct towards your customer relationship management efforts.
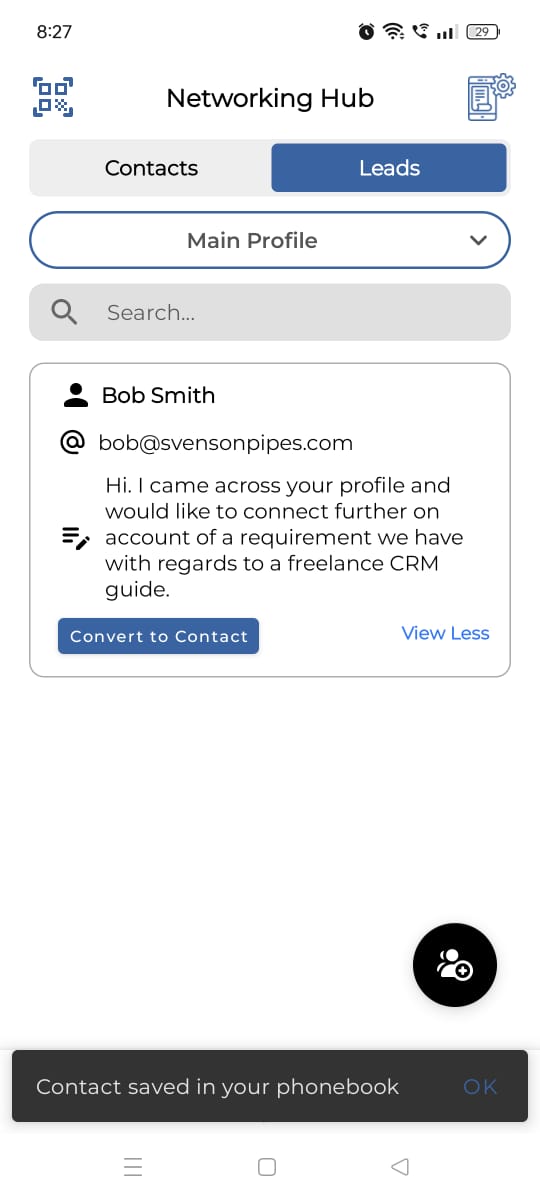
How To Add a Contact With mTap Hub?
Click the middle icon in the bottom menu bar to access mTap Hub in your mTap App. There are four ways in which you can add a contact on mTap Hub.
- Scanning a business card
- Importing a contact from your phonebook
- Adding a contact manually
- Adding a contact of another mTap user through QR code
Adding a contact to mTap Hub by scanning a business card
- Press the "Add Contact" icon represented by human figures, on the bottom right of your Networking Hub homepage.
- Press the "Scan Business Card" on the "Add Contact" screen. It will lead you to the scanner.
- Position the business card within the blue box so that it can be scanned accurately.
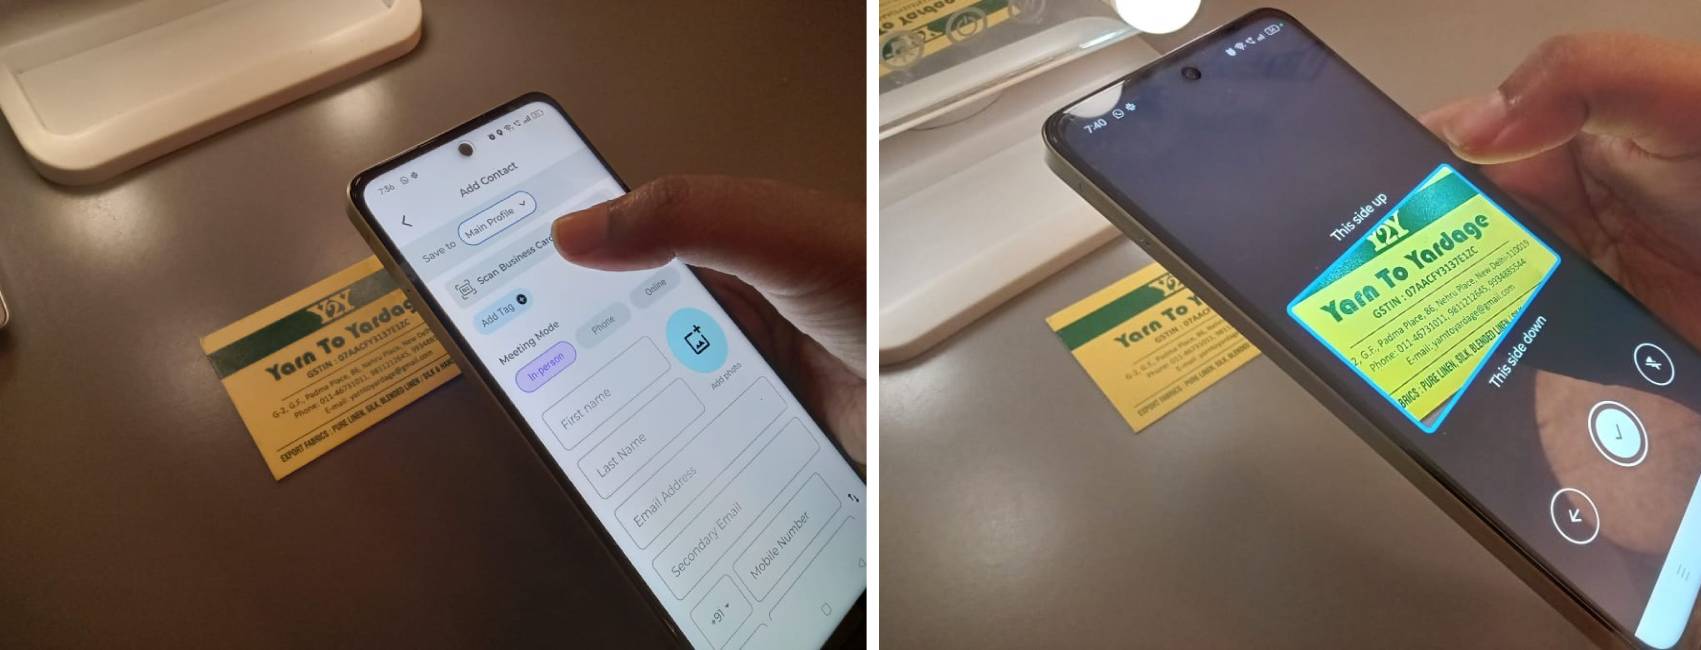
- Once scanned, the system will automatically populate the information that's present on the physical card, into your mTap digital business card.
- Choose the "Add Tag" button to assign a category to your contact. Categorization of contacts helps in seamless searchability.
- In the overlay that appears, choose your desired tag from the list of available tags or create a new tag by pressing "Manage Tags".
- On the "Manage Tags" screen, you will see a dropdown menu with a list of all your profiles. Choose the profile to which you want to add the tag.
- Press the "+" icon which leads you to the "Add New Tag" overlay.
- Add the name of your tag and the description. Press "Save Tag".
- To edit your recently created tag or any other tag in the list, click on the pencil icon and proceed with the editing.
- Press the "<" arrow to go back to the "Add Contact" screen and continue with the rest of the process
- You can sort contacts by meeting type, such as in-person, phone, or online.
- You can add shared and personal notes about your prospect and your meeting with them. Shared notes can be shared with your new connection via. e-mail, SMS and WhatsApp, based on the follow-up settings & templates discussed here. To enable the option of sending shared notes to your new contact as a follow-up message, scroll to the bottom of this "Add Contact" screen and toggle the "Send Email Notification" or "Send SMS Notification".
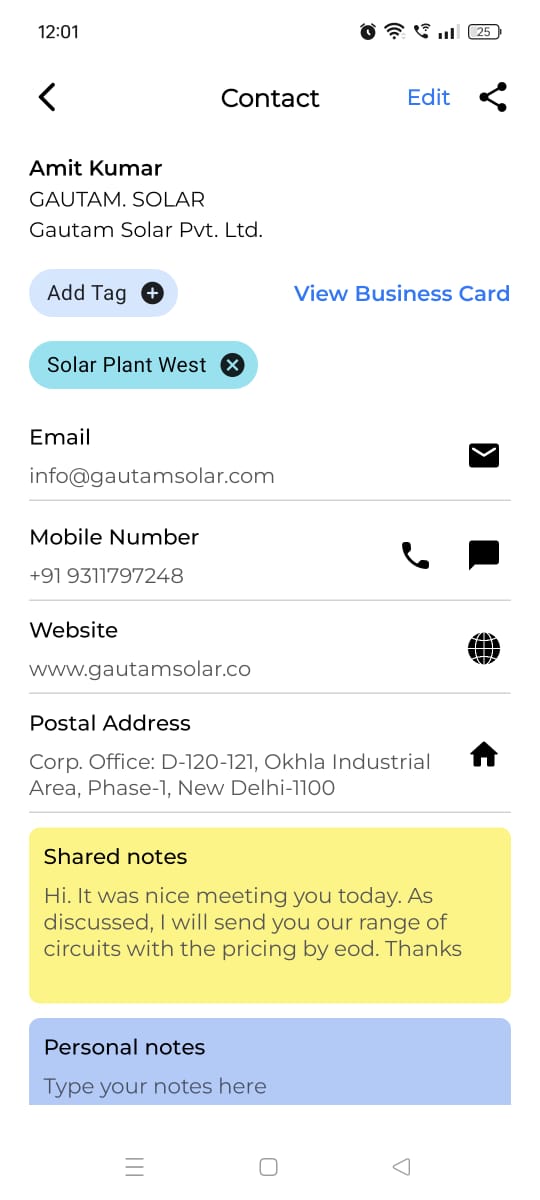
- If you have given location permission, the mTap App automatically picks up your location for the "Scanned At" textbox.
- Click "Save Data" to save the contact in your mTap Hub.
- Press the "download" icon and "allow" the required permissions to manually save the newly added contact added in your mTap Hub, to your phonebook. Otherwise, if the "Save Contact in Phonebook" option is not already enabled, toggle it "on" in the "General Settings". This will automatically create a copy of any newly added mTap Hub contact in your phone's contact list. You can read more about general settings in this tutorial about "The Menu Tab: Introducing all elements in Menu Tab".
- Press the notepad with a diary icon in the respective contact box, to edit the contact. You can also review your follow-up message and re-send it, as and when needed.
- Press the "share" icon to access the overlay of options available for sharing the contact.
Importing a contact to mTap Hub from your phonebook
- Press the "Add Contact" icon represented by human figures, on the bottom right of your Networking Hub homepage. It will take you to the "Add Contact" homepage.
- Press the 'phonebook icon' on the "Add Contact" screen. Your phonebook list will show up.
- Choose the desired contact.
- mTap will automatically save that contact in your mTap Hub
Adding a contact to mTap Hub by manually entering the data
- Press the "Add Contact" icon represented by human figures, on the bottom right of your Networking Hub homepage. It will take you to the "Add Contact" homepage.
- Fill in the textboxes with details of your new connection.
- Click on the "Add Tag" button to assign a category to your contact. Categorization of contacts helps in seamless searchability.
- In the overlay that appears, choose your desired tag from the list of available tags or create a new tag by pressing "Manage Tags".
- On the "Manage Tags" screen, you will see a dropdown menu with a list of all your profiles. Choose the profile to which you want to add the tag.
- Press the "+" icon which leads you to the "Add New Tag" overlay.
- Add the name of your tag and the description. Press "save tag".
- To edit your recently created tag or any other tag in the list, click on the pencil icon and proceed with the editing.
- Press the "<" arrow to go back to the "Add Contact" screen and continue with the rest of the process
- You can sort contacts by meeting type, such as in-person, phone, or online.
- You can add shared and personal notes about your prospect and your meeting with them. Shared notes can be shared with your new connection via. e-mail, SMS and WhatsApp, based on the settings discussed here. To activate the option of sending shared notes to your new contact as a follow-up message, scroll to the bottom of this "Add Contact" screen and toggle the "Send Email Notification" or "Send SMS Notification".
- Click "Save Data" to save the contact in your mTap Hub.
Adding a contact to mTap Hub by scanning the QR code of another mTap user
- Navigate to the QR code scanner within the 'Networking Hub' screen.
- Position your device so that the QR code appears within the scanning frame. The app will scan the code and open their mTap profile in your browser.
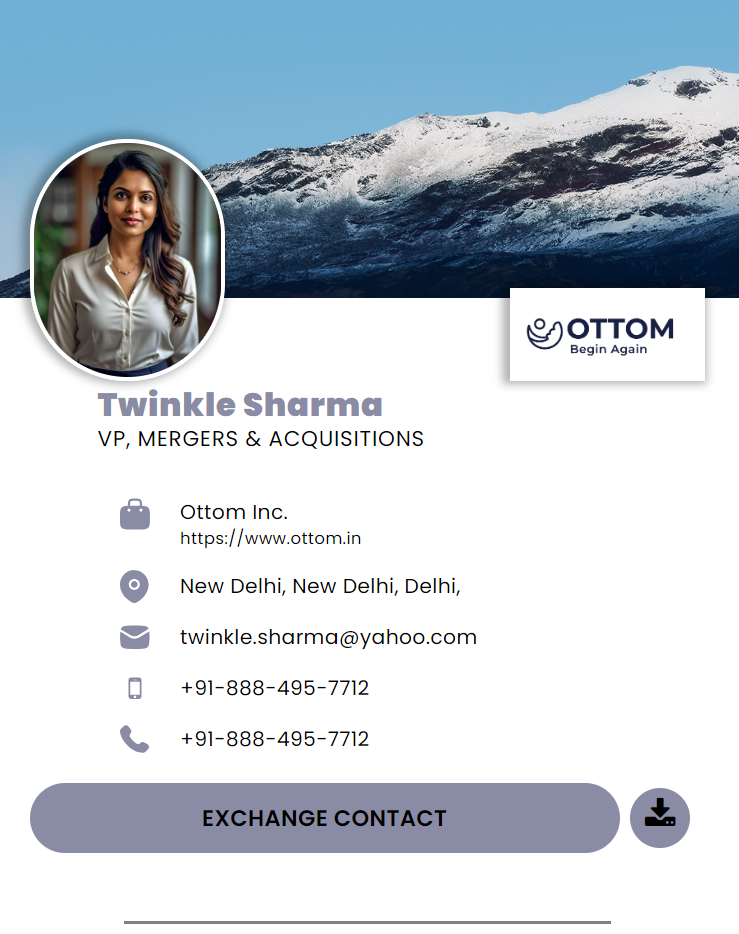
- Click the "save" icon next to the "exchange contact" button on their profile. An overlay will appear where you can "save contact" to your phonebook.
To see more of mTap Hub in action, watch our tutorial here:
Why You Should Habitually Use mTap Hub as a Widget?
Investing time in mTap Hub as a widget can significantly elevate your professional networking game. Here’s why you should make it a habit:
Streamlined Contact Management
mTap Hub simplifies contact organization with features like NFC technology for effortless sharing and seamless CRM integration. Connecting with and managing new contacts has never been easier.
Enhanced Follow-Up and Engagement
Regular use of mTap Hub ensures timely, personalized follow-ups with new contacts. Capture essential details during initial meetings and integrate them with your CRM for automated, thoughtful follow-ups, increasing the chances of nurturing valuable relationships.
Improved Personal Branding
The mTap app empowers you to build and reinforce your personal brand. Effortlessly share digital business cards and relevant content to present a consistent, professional image—essential for effective networking in today’s digital landscape.
Consistent Engagement and Relationship Building
With built-in analytics and follow-up prompts, mTap Hub helps you maintain regular touchpoints with your network, keeping relationships vibrant and mutually beneficial over time.
Environmental Benefits
Opting for digital business cards through mTap Hub reduces paper waste, supporting sustainability efforts and promoting eco-friendly practices.
Accessibility and Flexibility
As a widget, mTap Hub provides quick access to your networking tools anytime—whether in-person, online, or over the phone—maximizing your opportunities for impactful connections.
Enhanced Event Preparation
mTap Hub aids in preparing for networking events by allowing you to capture notes and insights on the go, ensuring you’re well-prepared for follow-ups and making your networking efforts more effective and memorable.
In summary, using mTap Hub as a widget consistently offers a structured approach to professional networking. It enhances contact management, follow-up strategies, personal branding, and engagement—all while promoting sustainability and leveraging advanced technology for networking success.
